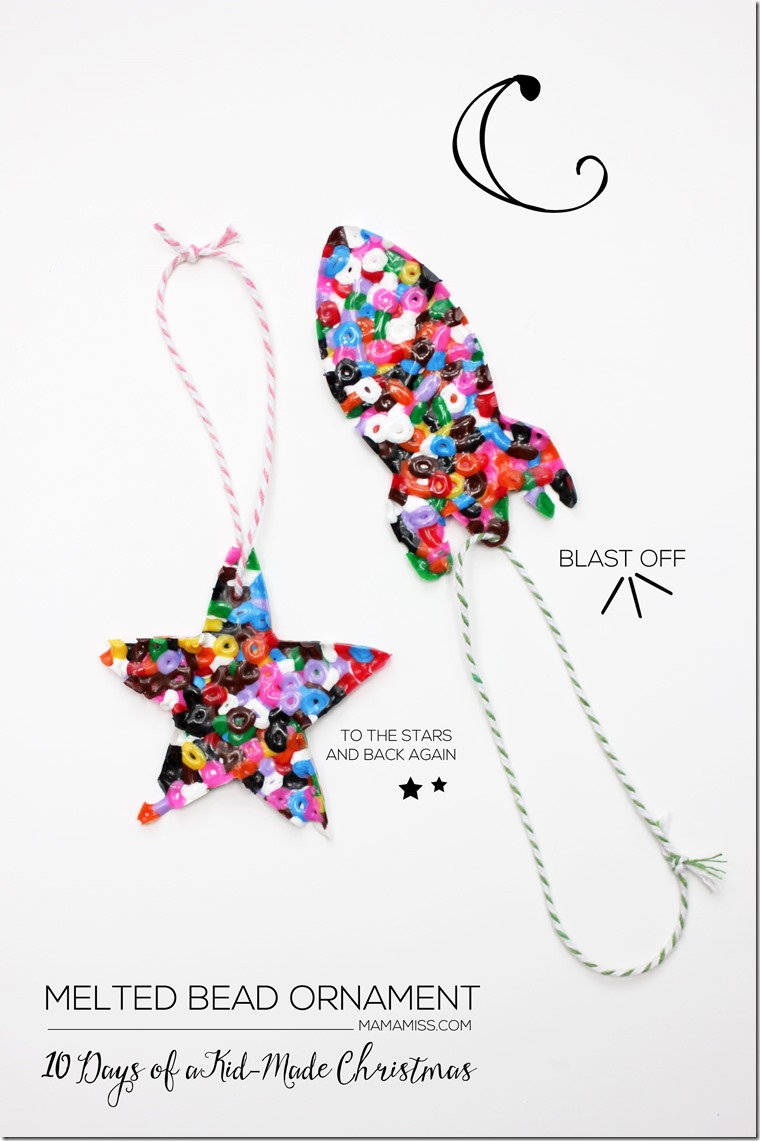
I’m back today for the final day of the kid-made ornament series! We have had 10 days – all of kid-made ornaments – that’s 70+ ornaments – all that KIDS can make – and all based upon your favorite children’s books to enhance the craft time with a story to go along with it!!!

- Check out all the ornaments here.
- Pick a favorite (or two!).
- Head to the library & grab the book the corresponds to your favorite ornament(s).
- Get your craftin’ on with the kiddos!!
Last week we started the series with our Elmer Ornament based upon Elmer’s Christmas book.
Today we are reading Santa’s New Jet by David Biedrzycki. A cute little story that puts a funny & modern spin on Santa’s trip to deliver presents in a speedy fashion.
To go along with the book we decided to make some new Santa jets of our own!
These melted bead (also called Perler bead) ornaments are so simple to make they are kid-made & kid approved!


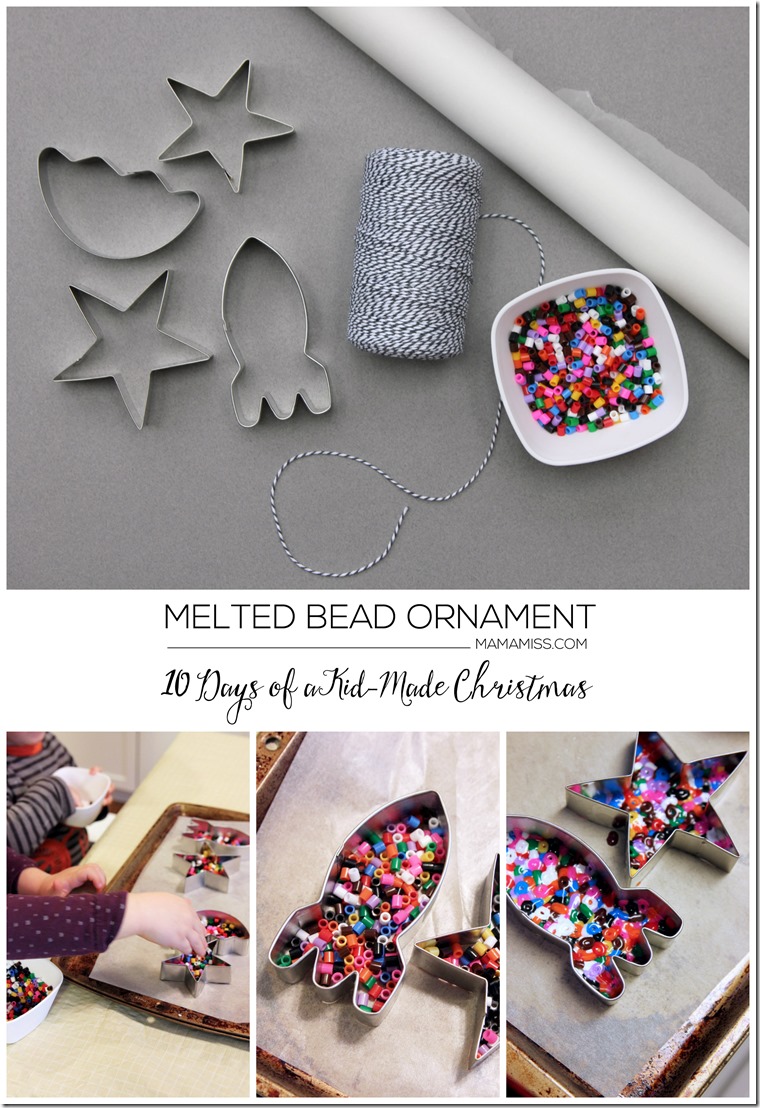
Let’s get started with your supplies!
- copy of the book Santa’s New Jet
- rocket/jet shaped metal cookie cutter
- star/moon shaped metal cookie cutters
- parchment paper
- metal cookie sheet
- meltable beads
- cooking spray/shortening
- twine
Now, let’s make them!
- Start off by reading the book together. Talk about the Santa & his new jet, about the symbolism of the book – the lesson – the morals.
- Time to create – gather your supplies!
- Lay out a piece of parchment paper the length of the cookie sheet.
- Line the inside of your metal cookie cutters with either shortening or cooking spray.
- Place your metal cookie cutters on top of the parchment paper.
- Fill the cookie cutters with the meltable beads – create a pattern or just fill it up!
- Make sure the beads are all one layer – don’t double up the levels/layers of beads because it will take longer to bake & will alter the ornament shape.
- MAMA STEP – place them in the oven to bake. Follow the instructions for YOUR meltable beads – look on the package – depending on the brand you use, the oven temps & baking time will vary.
- MAMA STEP – Once baked, remove from the oven to let cool completely (once again refer to the individual instructions on your meltable beads because cooling times will vary on brands).
- Once cooled, remove your melted bead ornaments from the metal cookie cutters.
- Cut a piece of twine to your desired length.
- Thread twine through one of the holes remaining in the melted ornament.


Make sure to check out the whole series – linked above, and the other lovely gals I’m sharing the final day with today!
Lovely Commotion // Dream Snow Ornament
Great Googa Moogas // Truffula Tree
Mosswood Connections // Crayon Ornaments
Mommy Loves Trees // Pine Cone Ornament
Mom Inspired Life // Nativity Ornament
My Nearest and Dearest // Twig & Cranberry Ornament
Fireflies and Mud Pies // Three French Hens Ornament
The Life of Jennifer Dawn // Embossed Nutcracker Ornament
Simply Vicki // Snowflake Ornament
Made with Happy // Jingle Bells Wreath Ornament
My Bright Firefly // Storytelling Ornament
And be sure to check out the Kid-Made Ornaments pin board too!
Follow Melissa {Mama Miss}’s board Kid-Made Christmas: Ornaments on Pinterest.
Which ornament will you & your kids make?!

♥
Like what you see?!
You can connect with me on:
Pinterest || Facebook || Twitter || Google +
And don’t miss any updates…
♥
© Mama Miss. All images & content are copyright protected.
Feel free to share ONE picture and linking directly to this post for download.
Please do not copy directions, ingredients, or pdf files for your own website or Facebook page, visuals or words.
Copying my post partially, or fully, is strictly prohibited.
All work by Mama Miss is licensed under Creative Commons Attribution-NonCommercial-NoDerivs 3.0 Unported License.
♥♥♥


I love how cute and colourful these are. This is such a sweet idea!
I recently saw someone do something similar with peppermint candies – I may have to do both versions now!
Thanks for sharing, I’m pinning this to my Christmas board.
Wishing you a lovely day!
xoxo
oooh I saw & pinned the peppermint one too!! Thanks Jennifer :) xx
Very cool, love all the colors!
Thanks Valerie! xx