So, here’s my ambitious plan – every year I’d like to start doing a kid-made series for the holidays! There are so many beautiful things that are kid-made, and so many directions it could go in, I’d figure it’ll keep me busy for at least a couple of holiday seasons :) Well, to kick off the FIRST EVER kid-made Christmas series, we are blowing it out of the frozen water with ORNAMENTS!
Some of my favorite ornaments from my childhood are the ones my mom saved that I made…I love my little initials scrawled on the back of them…they make me smile. Growing up we had every kind of ornament imaginable decorating our tree – all with meaning. Some homemade, some heirlooms, and several glass pickles (hehe it’s a German thing), but all were treasured. I have been handed down some of these ornaments and will hand them down to V&T one day too. That’s what it’s about, the memories, the dreams, the meaning, (the glass pickles ;)…am I right?! My mom even hung ornaments on the plants, we had so many!! hehe – I shall explain…during the winter, my parents brought all the potted plants that were normally on the porch in the summer, indoors. The living room at my parents house in the winter was (& still is) a mini jungle providing many more branches to decorate. And they were decorated to the max too.
So, I’m all about an eclectic & homemade kinda’ Christmas tree with lots & lots of homemade love. And now that V&T are a little older this year I thought we’d kick off the season with making some special kid-made ornaments! And, bright idea moment! I decided the more ornaments, the merrier (literally)! So I asked some other fabulous bloggers in the Kid Blogger Network to create a kid-made ornament with their little ones too & share them with us!!! So, for the next twenty days, December 1-20, we will have several new kid-made ornaments each day – wahoo! I’m sooooo excited!!! So, are you ready to get crafting with the kiddos?! And remember grandma’s & grandpa’s LOOOOOVE homemade kiddo gifts too – so go crazy & make bunches :)
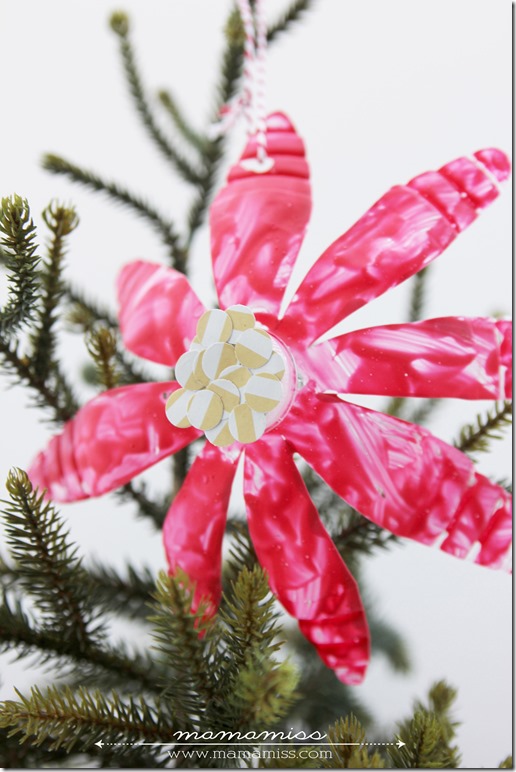
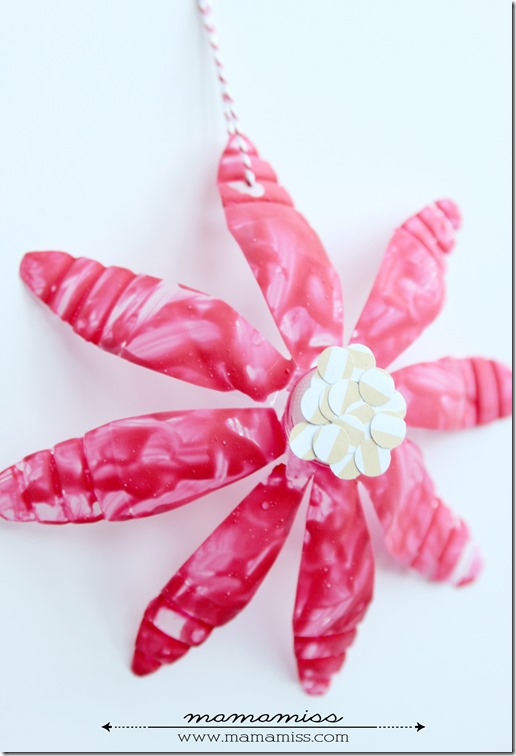
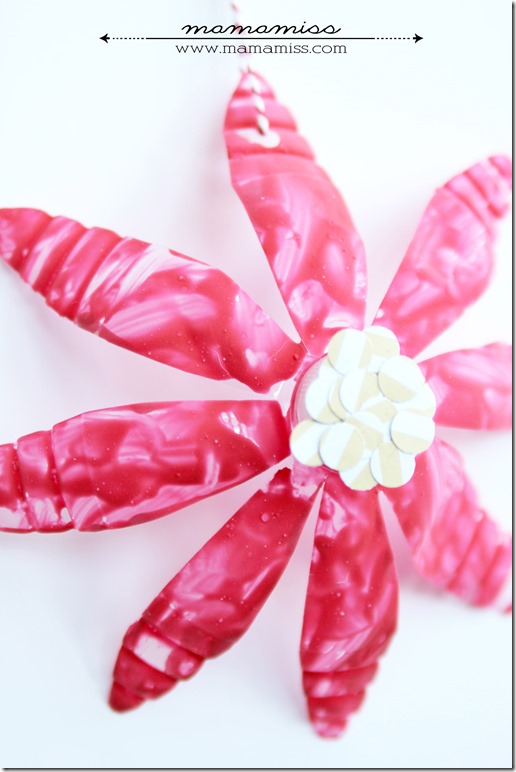
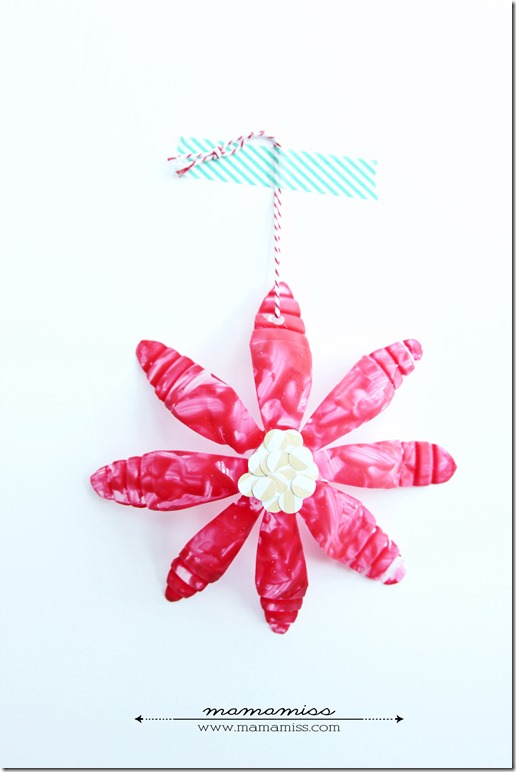
Without further ado…here is V’s kid-made ornament creation, for our kid-made Christmas…our beautiful poinsettia!

♥

tools:
clean plastic water bottle
yellow printed paper
hole punch
scissors
q-tip
glue
optional: Mod Podge (for sealant)
steps:
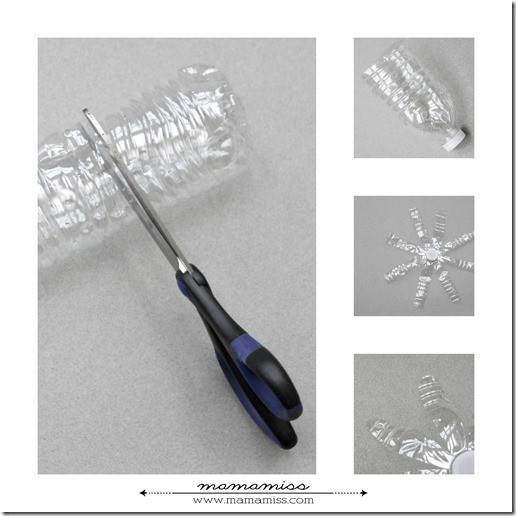
Cut the water bottle in half.
From the bottom to the cap cut out eight petals.
Shape each petal with a rounded edge.
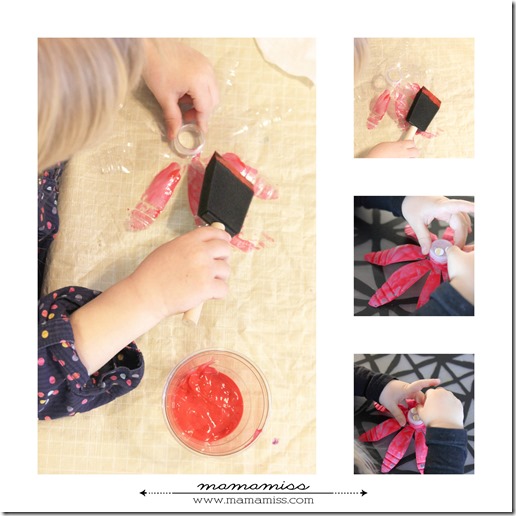
Paint the petals, let dry, apply second coat, let dry.
Cut out circles from yellow paper with 3/8 inch punch.
Using a q-tip dipped in glue, place & overlap circles on the cap, creating the flower center.
(optional: depending on your paint – a sealant may be necessary to stop it from flaking – at this point we used Mod Podge).
Let dry then hole punch top. Thread twine through hole to hang.

Plus, you can turn it into a learning opportunity too – get a book to go along with it & make it a book and a craft :) Here are a few that I like…
Here are the other fab bloggers that are posting today, make sure you pop on by & start pinning!!
Oh & speaking of pinning – you can find all kinds of kid-made ornaments here for your kid-made Christmas & I’ll be pinning all the ornaments as they are linked up below too, to this board. Soooo get to crafting & linking, my friends :)
You can find the schedule here of what is coming each day (where I’ll also link the actual post up as they go live). Plus you’ll find them linked up below! I can’t wait to see what you’ve been crafting with your kiddos!!
Would you like to join in on the fun too?!
Here’s how:
- Just link a KID-MADE ornament you’ve created with your kiddos. (Q: What’s kid-made? A: Well, it must be made by your kiddos, or with some mama help, just not totally mama-made).
- Add this pretty little button to your blog post, or your sidebar, or somewhere on your beautiful blog letting me know you are joining in on the fun too!!
- Please only link things you’ve made, from YOUR blog.
- Label it: 20 Days of a Kid-Made Christmas: Ornaments & link it to THIS page.
Oh & PLEASE limit your kid-made ornament links to 2 a day too. I think that’s a good number, if I hear crickets I’ll increase it – it’s just that this is going for 20 days so I don’t want this page to go on for days lol ;) The link up will be open from December 1st until December 21st for all entries.
![]()
[inlinkz_linkup id=344844 mode=1 pageSize=300]
![]()

♥
Like what you see?!
You can connect with me on:
Pinterest|Facebook|Twitter|Google + too!
♥
© Mama Miss. All images & content are copyright protected.
Feel free to share one picture and linking directly to this post for download.
Please do not copy directions, ingredients, or pdf files for your own website.
Copying my post partially, or fully, is strictly prohibited.
All work by Mama Miss is licensed under Creative Commons Attribution-NonCommercial-NoDerivs 3.0 Unported License.
♥♥♥






This is sooo cute, but I’ve cut out the ‘petals’ and they won’t lie flat; they keep springing back into the bottle shape. Help!
Thanks Jill! Did you try, when you are cutting, to cut a little bit into the top ridged part?! After I went up a little further with the scissors it was fine. But, I imagine different water bottles may vary due to how they are made – try spreading the petals out, after cutting, & then adding a book or something heavy on top of it for a little while, or overnight, to help. Hope that helps :) xx M
These are so cute! I started these w my pre k class and the red paint started peeling, any suggestions? I used simply washable red tempra paint. I saw the paint you used, but was trying to use what we had first. Have you had any problems with it flaking off? It’s so cute hope my kids can finish the project
Thank you!
Hi Leslie! Mine did too – so I ended up sealing it with Mod Podge on the second one. I’ll add that to the post – thank you!! It seems to be working really well with the Mod Podge sealant :) Oh & you can get it at Michaels or AC Moores craft stores & use the 40% off coupon too (save ya some $$) Hope that helps!! Thanks! xx M
These are darling. What a fun craft!
Thank you Marie!!! Completely blown away that you were visiting my blog – thank you for taking the time to leave a comment :) xx M
Nice & pretty upcycling! Love it :)
Thanks Valerie! xx
What a great way of sharing ideas. I love your plastic bottle poinsettia.
Thanks Norah!! Thanks for stopping by :)
These are gorgeous, Melissa! I can’t believe they used to be plastic bottles. Thank you so much for hosting this series…it’s such a great idea, and I’m so excited to be a part of it!
Thanks Jessica! So excited to have you as part of it too :) xx
I LOVE upcycling! What a beautiful craft!
Me too!! Love to give things another life :) Love your lanterns too Varya & their dual holiday uses!! xx
These are gorgeous! I am going to add these to our list of ornaments to create this month. LOVE IT!
awww shucks – thanks Lauren!!! So happy you are adding them to your list – that’s wonderful!!! Can’t wait to see your kiddo creation :) xx