
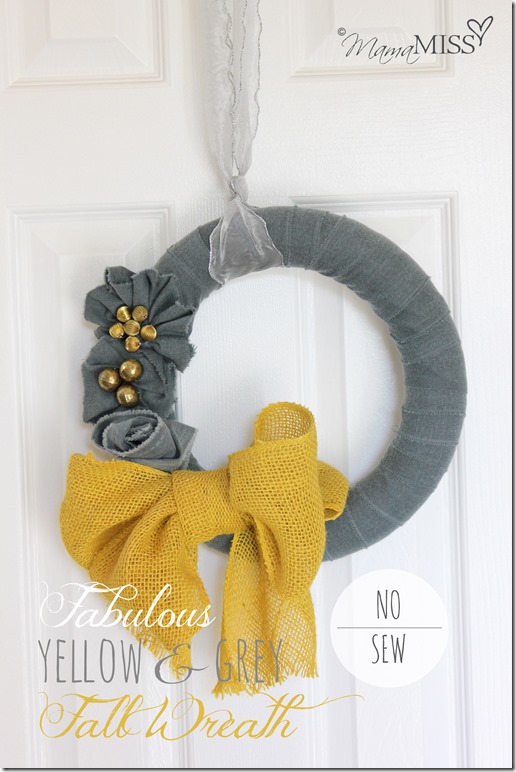
My new obsession – mustard & slate, citron & charcoal, saffron & smoke – whatever you call it, it’s yellow & grey – and the combo is fabulous!
I am constantly pinning color combo’s that are my favorite & this is one of them that I am ALWAYS drawn too. Plus, I’m a little cuckoo for burlap too – so imagine my joy when I saw this beautiful yummy mustard color in burlap – joy oh joy!!! A fab wreath was in my future! I haven’t made a wreath in over a year…maybe it’s a fall thing that makes you want to be outside hanging one – who knows?!
Anywho – I’m lovin’ my new wreath. And, fret not – this is SERIOUSLY the easiest wreath to make – A NO SEW FALL WREATH!! No joke – I literally whipped it up in a hour sitting on my sewing room floor one night, as you may have seen already on Instagram. Doesn’t everyone pull out tools to make a wreath at 11pm?! lol no?! Inspiration hit me, so I went with it and created this with tools & supplies I already had in my sewing room. I am the ultimate, on-a-whim crafter. I usually have a loose plan, but rarely have the correct supplies – so I usually utilize what I already have because I never know where things will take me when I’m crafting. I’m soooo not a crafting planner. I’m a planner in EVERY OTHER aspect of my life…but not this ;)
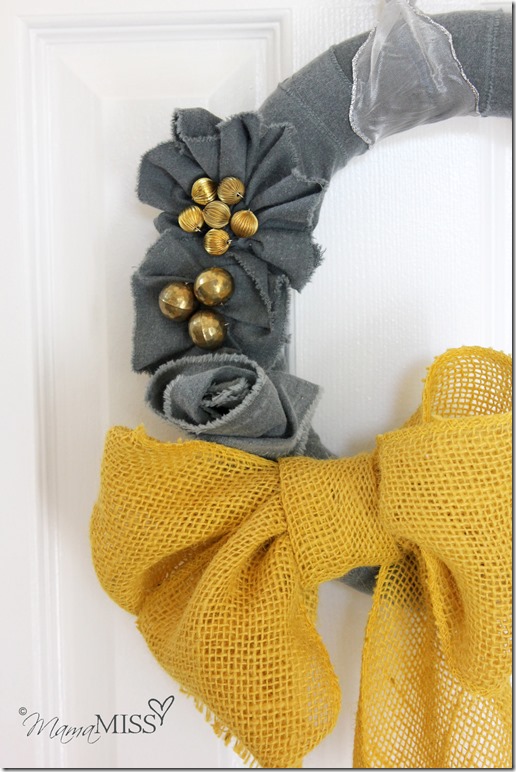
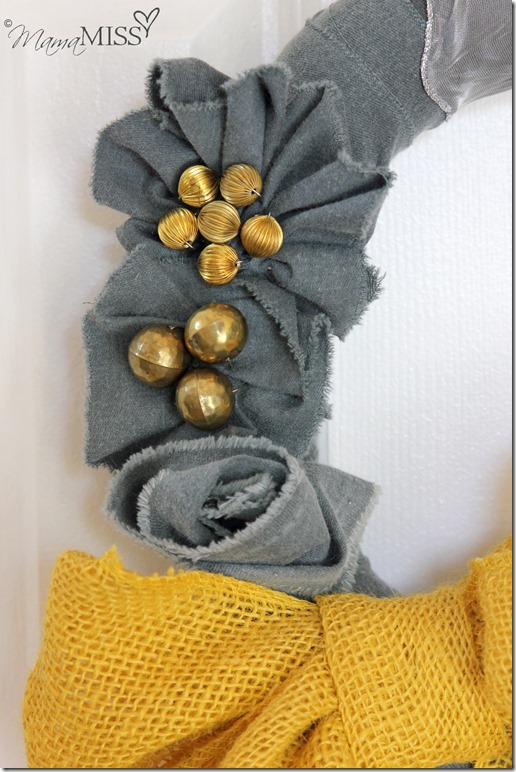
So, what made me inspired at 11pm?! Why, perusing Pinterest, and drooling over yellow & grey things, of course ;)
So, back to the wreath in a moment (the tutorial is after these messages ;), but first – let’s talk MORE yellow & grey, shall we?!
Like this FABULOUS Carryall Bag from Petunia Pickle Bottom…
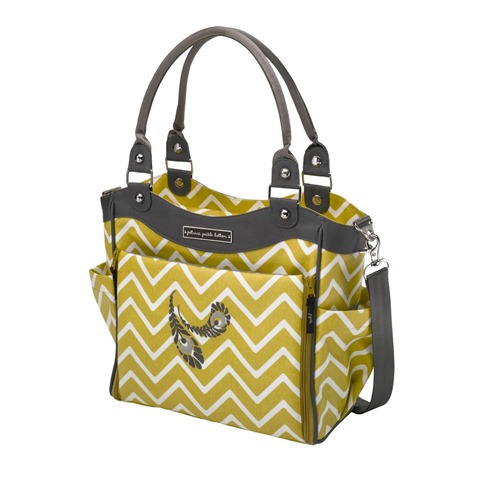
City Carryall: Sunshine in Scandinavia
♥
Are you drooling like me?!
Wanna win one?!
WAHOOOOOO!!!
I’m teaming up with some super-fab bloggers for this giveaway, including Ashton from Something Swanky who put this fabulous giveaway together!!!
Just enter via the Rafflecopter form below for EIGHT, that’s right, EIGHT entries :)
By entering using the form below, you can win ANY City Carryall in the pattern of your choice!!

Look at all those designs!!!!
Oh happy day!!
(oh and, if you win, you know which one I’m drooling over ;) just kidding (maybe?!)
And here’s that tutorial, so now you can have a matching wreath for your new bag right?! ;)
- Styrofoam extruded wreath (I used this 12” one)
- 4” wide grey microfiber (it has to have a little stretch in it to sit closer to the wreath for wrapping) fabric strips
- 6” wide mustard burlap ribbon (I got mine here)
- beading pins – 14-7/8 inch
- tidy pins – 1-1/4 inch
- 3 large (3/4”) brass beads (mine are random vintage ones I had laying around – but these ones
are similar)
- 6 small (1/2”) brass beads (again, mine are random vintage ones – but these ones
are similar)
- fabric scissors
- aluminum craft wire
- wire cutters
- quilter’s pins – 1-3/4 inch
*note: the amount of fabric, beading pins, and tidy pins will depend on the size of your Styrofoam wreath

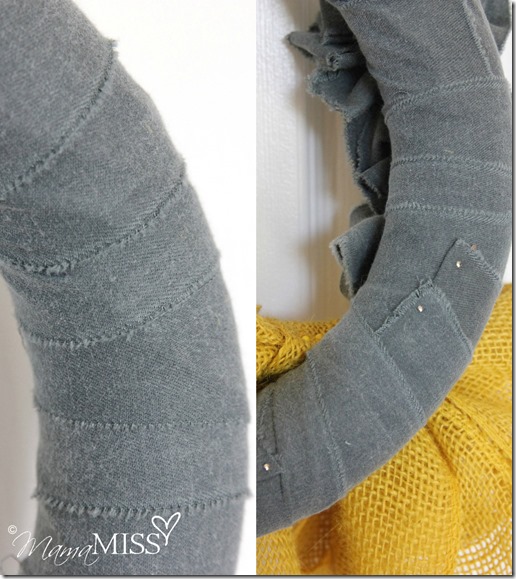
- Start by the wrapping fabric strips around the wreath securing them along the way with the beading pins.
- Wrap, overlapping the fabric strips, and pin until finished (the right pic is the back view – some pins will show, but they are on the back so they won’t be in view :)
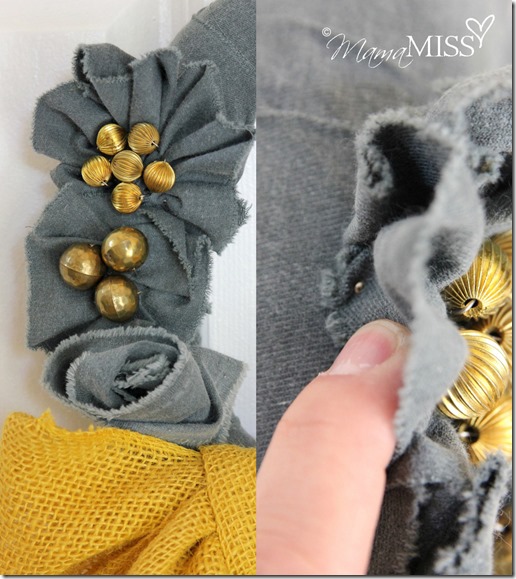
- The flowers are next and are just super-simple bunched together flowers. I just bunched fabric together trying to create a circle – I didn’t use a template – I just did them randomly using a 4” fabric strip for each flower. Need some inspiration or a tutorial? Have a gander at my “flower power” Pinterest board – I’ve pinned quite a few :)
- Next, pin the flowers on the completed wreath with the beading pins, overlapping them as you go.
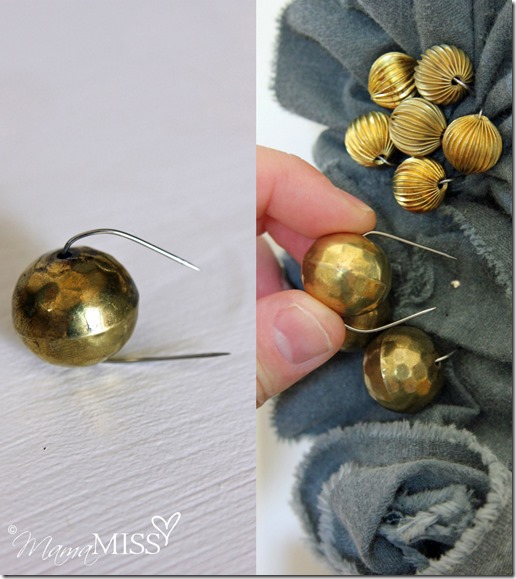
- Thread the tidy pins through the beads, bending them to fit through, and then bending them down around the bead.
- Place them in the centers of the flowers like shown, piercing the foam, kind of like a tack.
- Using the burlap ribbon, create a large bow, with two loops on each side. Secure with craft wire. Trim craft wire. Cut a small strip of burlap to wrap around the center.
- Secure ribbon to wreath with quilter’s pins (the yellow heads will hold the burlap better & will camouflage with the ribbon ;)
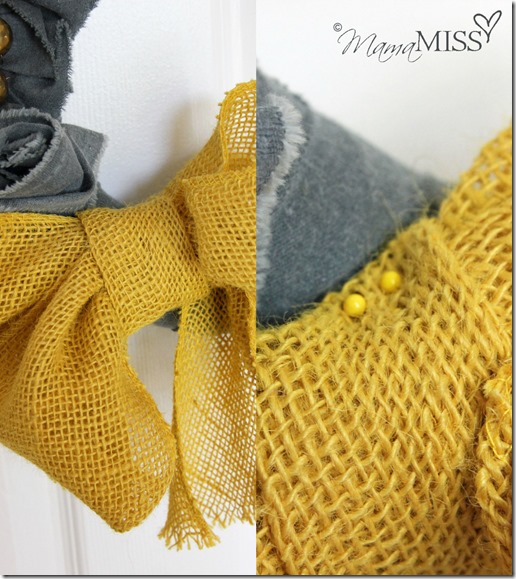
And voilà! A fab NO SEW fall wreath!

♥
Like what you see?!
You can connect with me on Pinterest|Facebook|Twitter|Google + too!
♥
© Mama Miss. All images & content are copyright protected.
Feel free to share one picture and linking directly to this post for download.
Please do not copy directions, ingredients, or pdf files for your own website.
Copying my post partially, or fully, is strictly prohibited.
All work by Mama Miss is licensed under Creative Commons Attribution-NonCommercial-NoDerivs 3.0 Unported License.
♥♥♥
Please note that affiliate links are also provided throughout the post for your convenience – to allow direct access to the products suggested.

I love everything about this wreath! Especially the large yellow bow! Gorgeous!
awww thanks Kathryn!! Thanks for popping by too :) xx
Adorable! Really like the fresh take on this. I did a yarn one a few years ago, and now I’m thinking about giving it a new life. Thanks for the inspiration. Coming over from TT&J.
Thanks Ashley :) xx
i love the chevron and green or the grey and green towards the bottom….so cute! Love the wreath as well!
What a cute wreath!
Thanks Diane!! xx
Definitely would choose the mustard chevron!!!!!! SO lovely!!!!
I love Happiness in Hamburg. These carryalls are awesome!
Love the happiness n hamburg pattern