Nothing like pulling something out of thin air last minute…yep, that’s me…I do best under pressure with little time – HA! I’ve ALWAYS been this way. This one time at band camp…wait I didn’t go to band camp ;) I mean, this one time in college…it was the night before a final garment was due (degree in Fashion Design, i.e. “the garment”). I decided at 11pm that I was not liking AT ALL the way this dress was turning out…so at 11pm the night before my 9am class…I took the whole garment apart & started from scratch – Yep, I’m crazy! But, you know what, it ended up being one of my favorite designs!! So, there – I’ve always waited until the last minute to throw something together :)
So, why not decide 1 1/2 days before Thanksgiving, hmmm, let’s make some place cards – yippee!!! (no joke – I literally threw this together during naptime today, creation to post). I’m a little nutty, I know. So, on to the good stuff…how cute are these little wheat bundle place cards?! (And, here’s a little secret, you most likely already have most of these things lying around the house!)
♥
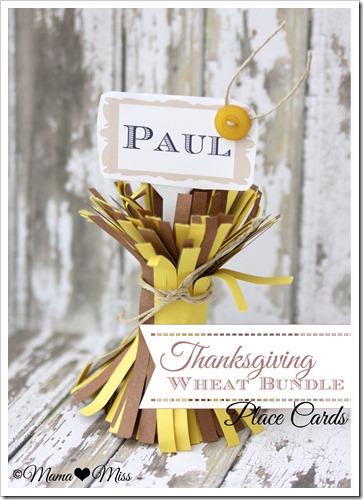
Materials/Tools
yellow & brown construction paper
twine
toilet paper roll
scissors
double stick tape
regular tape
plastic plant marker or popsicle stick
printed names or marker
optional: button
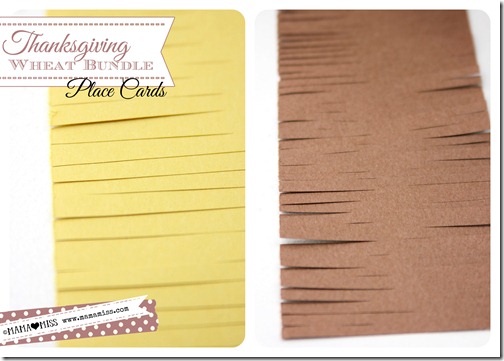
Step 1:
- Cut a piece of yellow & a piece of brown construction paper in half lengthwise (this will turn your 2 sheets into 4 pieces). You will only need 2 pieces to make one wheat bundle – 1 half of brown & 1 half of yellow.
- Using one half from each color, cut slits down both sides of each color (just trim the sides – DO NOT connect in the middle with the cuts).
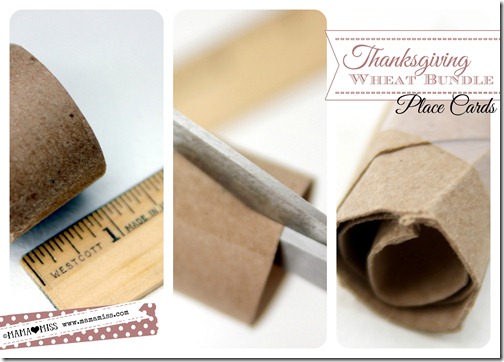
Step 2:
- Cut off a 1 inch piece of toilet paper roll.
- Open up the 1 inch piece by cutting it open.
- Roll the piece to make it a smaller roll; secure tightly by wrapping tape around entire piece.
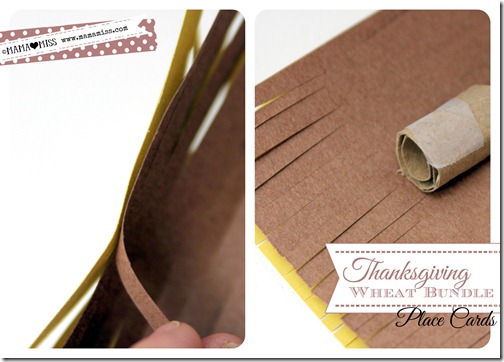
Step 3:
- Lay brown paper on top of yellow paper. Using double stick tape, secure pieces together.
- Place TP roll on construction pieces centered in the middle (the non-cut part).
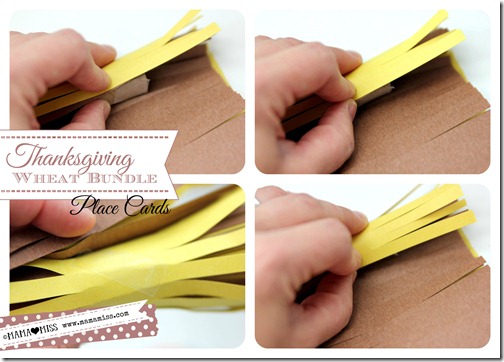
Step 4:
- Roll up the construction paper with the TP roll inside.
- Once finished secure the end with double stick tape.
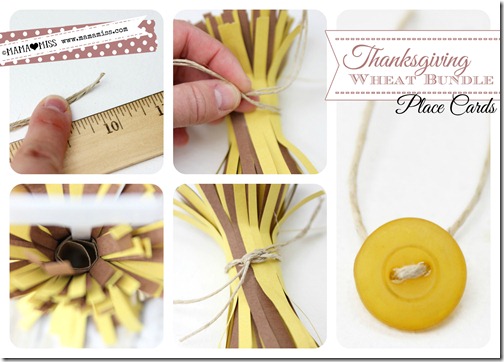
Step 5:
- Cut two pieces of twine approximately 10 inches in length.
- Wrap twine pieces, doubled up, around the wheat bundle. Secure with a knot.
- Fluff top & bottom of wheat bundles to make them look more abundant. It also allows for easier table placement.
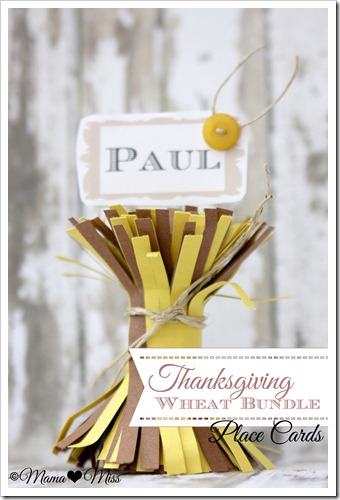
- Write on or print out labels to attach to your plant markers or popsicle sticks.
- Wedge the plant marker/popsicle stick in the wrapped TP roll down the center.
- Optional: thread small snip of twine through button to attach to label.
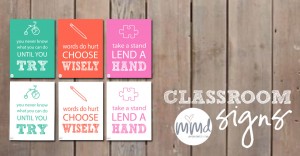
Oh, and while we are on the subject of table placement – check out these cool placemat free printables I did for the kiddos a while back. It’s the perfect time for them to help you set up the kiddo table all fancy, too!! :):)
Do you have everything ready for Thanksgiving yet or are you going to throw everything together last minute like me?
xx ♥ m




Awesome idea! This is so creative. :)
Thanks Carolyn :) It’s amazing what you can come up with in crunch time!
xx ♥ m
Very cute and probably a lot cheeper than the ones at paper source. Thanks for the tutorial.
Great minds think alike! I had no idea about the Paper Source one (had to google it!). What a cool little kit – man, I wish they still made them, because that would have been a little easier to buy a kit rather than creating them from scratch – LOL! But they were super easy – haha – maybe I need to apply for a job at Paper Source :) Thanks for tipping me off Megan :)
xx ♥ m