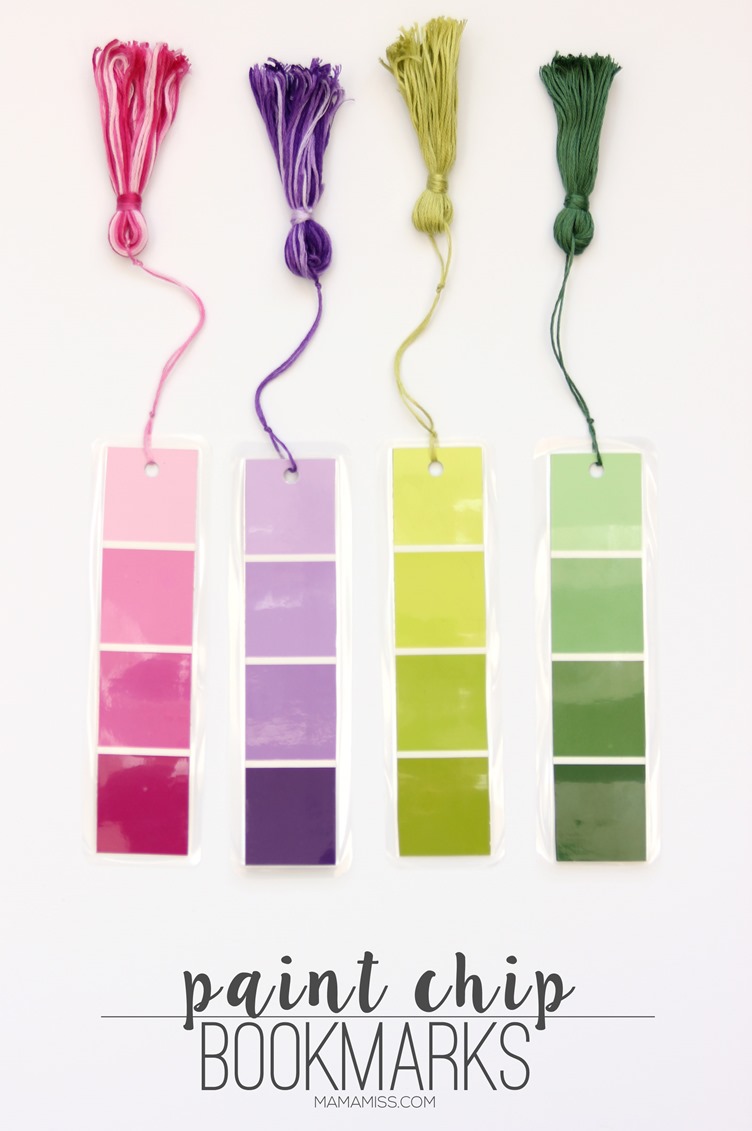
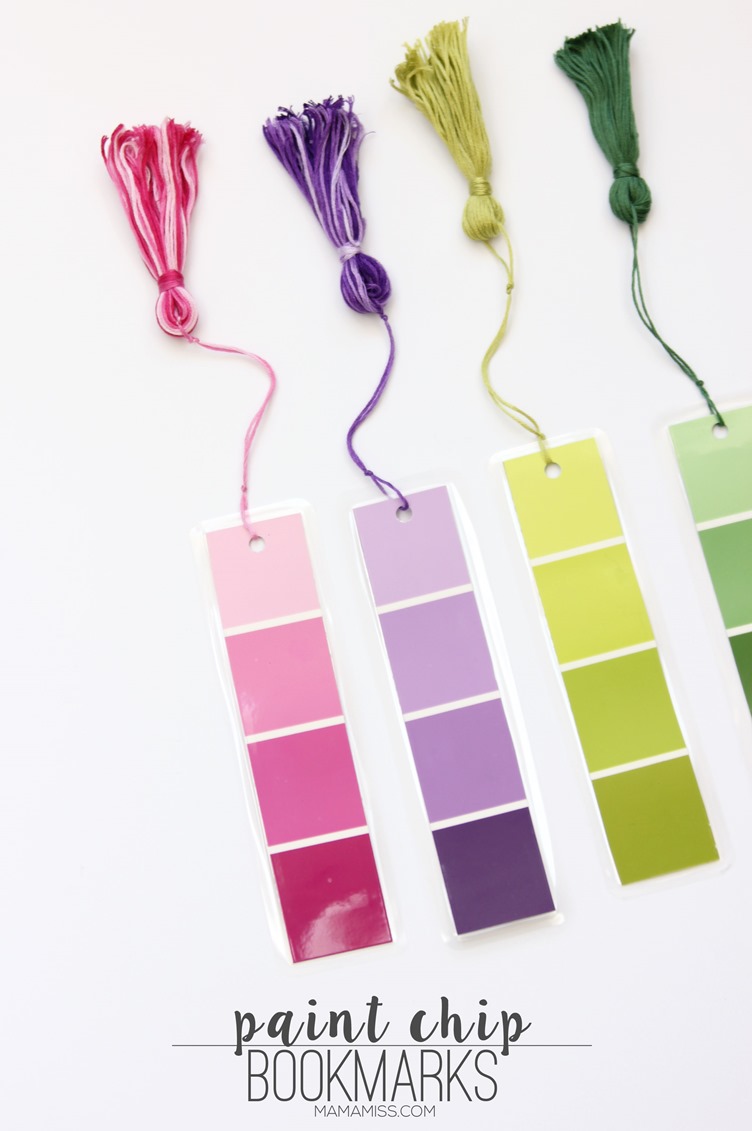
Paint chips have been on the brain lately – I first spied these bookmarks around Valentines day & thought what a brilliant idea! I wasn’t to keen on the words on them, and wanted it to be less valentine’s day and more everyday. So, I created these Paint Chip Bookmarks, and they are unbelievably simple to make!
I love the the ombré effect of them & and wanted the tassels to resemble the old-school bookmarks I had when I was younger, made with simple embroidery thread.
V LOVES her books, and has been requesting a bookmark for ages now. I kept telling her that we’ll make one, and then saw these and decided these were perfect for her obsessive need for pink!! So, we went to the hardware store, and while picking up several things (including a base for a fun upcoming photo DIY project – eeeep ;)), we also grabbed some paint chips. V picked out pink & purple (big surprise), and T picked out 2 different shades of green (the boy loves his green). V & I then took a girls trip to the craft store & she meticulously matched up the paint chips to the embroidery floss.

And, here’s how we made the Paint Chip Bookmarks!
What you’ll need to make the Paint Chip Bookmarks:
- Paint Chips
- Matching Embroidery Thread
, one skein for each bookmark (we used colors 52, 472, 367, & 48)
- Ruler
- Pencil
- Double Sided Tape
- Scissors
- Paper Cutter
- Laminator
- Single Hole Punch
How to make the Paint Chip Bookmarks:
the bookmarks…
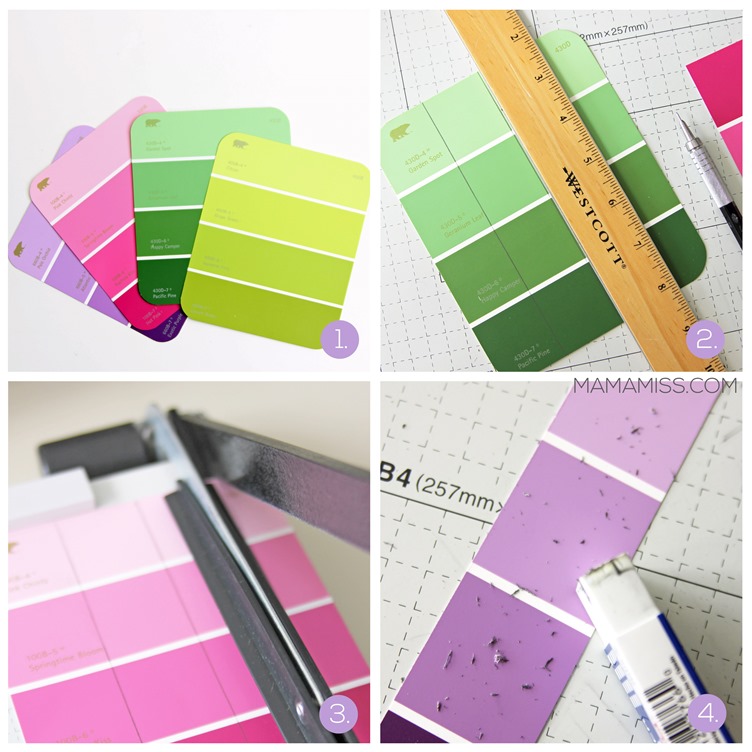
- Grab your paint chips and ruler. (1)
- Trace ruler strips next to each other down the middle of the paint chip. (2)
- Cut each strip out, either with scissors or paper cutter. (3)
- Erase the pencil marks. (4)
- Tape the two strips together, lined with double stick tape, with colored parts out.
- Repeat steps for the other bookmarks.
- Laminate the bookmark(s). Now, because the bookmarks are smaller than the 8.5×11 lamination sheet, they will bubble & bend between them. I solved this problem by feeding them through the laminator several times in all directions to flatten them further.
- Punch a hole in the top of each bookmark after lamination.
the tassels…
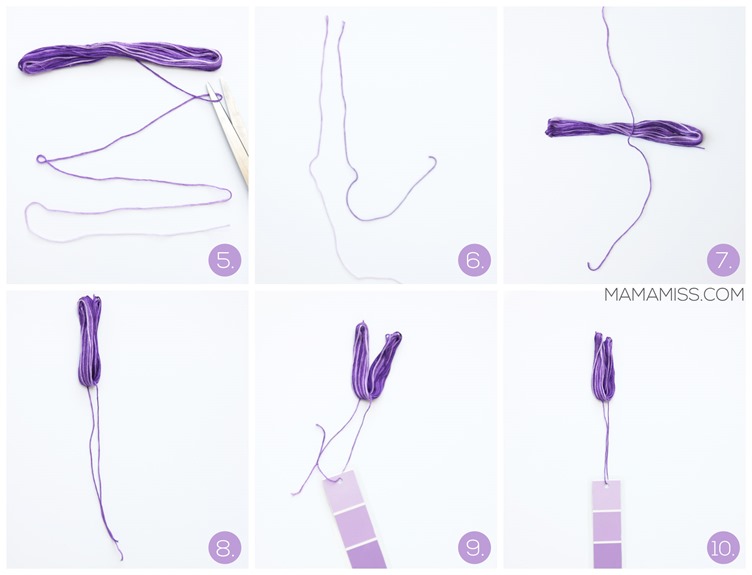
- Unwrap the embroidery thread. Using the bends in the thread as measurements, pull out 4 folds, cut into one long strip. (5)
- Fold the 4 folds in half making them 2 long strips, cut into two strips. (6)
- Take one of these strips and place in the middle of the embroidery thread. (7)
- Pull the embroidery thread in half. (8)
- Knot thread through the hole in the top of the bookmark. (9)
- Move the knot into the embroidery thread bunch. (10)
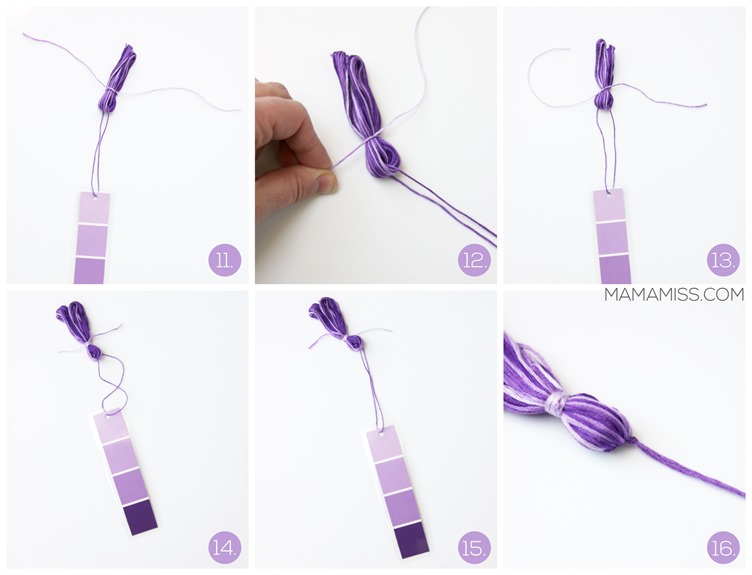
- Using the other strip, wrap it around the embroidery bunch. (11)
- Knot it. (12/13)
- Wrap the ends around the knot. (14)
- Tuck in the threads. (15)
- Knot at the top of the embroidery bunch, and at the top of the bookmark, locking the tassel in place. (16)
- Cut the embroidery bunch open.

Now you can read & not lose your place in your fairy books :) Life is indeed complete.


And there you go… pretty little ombré paint chip bookmarks all in a row.

♥
Like what you see?!
You can connect with me on:
Pinterest || Facebook || Twitter || Google +
And don’t miss any updates…
♥
© Mama Miss. All images & content are copyright protected.
Feel free to share ONE picture and linking directly to this post for download.
Please do not copy directions, ingredients, or pdf files for your own website or Facebook page, visuals or words.
Copying my post partially, or fully, is strictly prohibited.
All work by Mama Miss is licensed under Creative Commons Attribution-NonCommercial-NoDerivs 3.0 Unported License.
♥♥♥





[…] Paint Chip bookmarks// Mama Miss […]